Today, I'm thrilled to share our latest creation – an audio visualizer that's not just cool but cooler-than-the-other-side-of-the-pillow cool. Let's dive into the nitty-gritty of how we combined TypeScript, React, the Web Audio API and THREE.js to make something that's way more exciting than our old audio player, which, let's face it, was about as exciting as watching paint dry. 😴
You can play with the audio visualizer on it's own with your own microphone here.
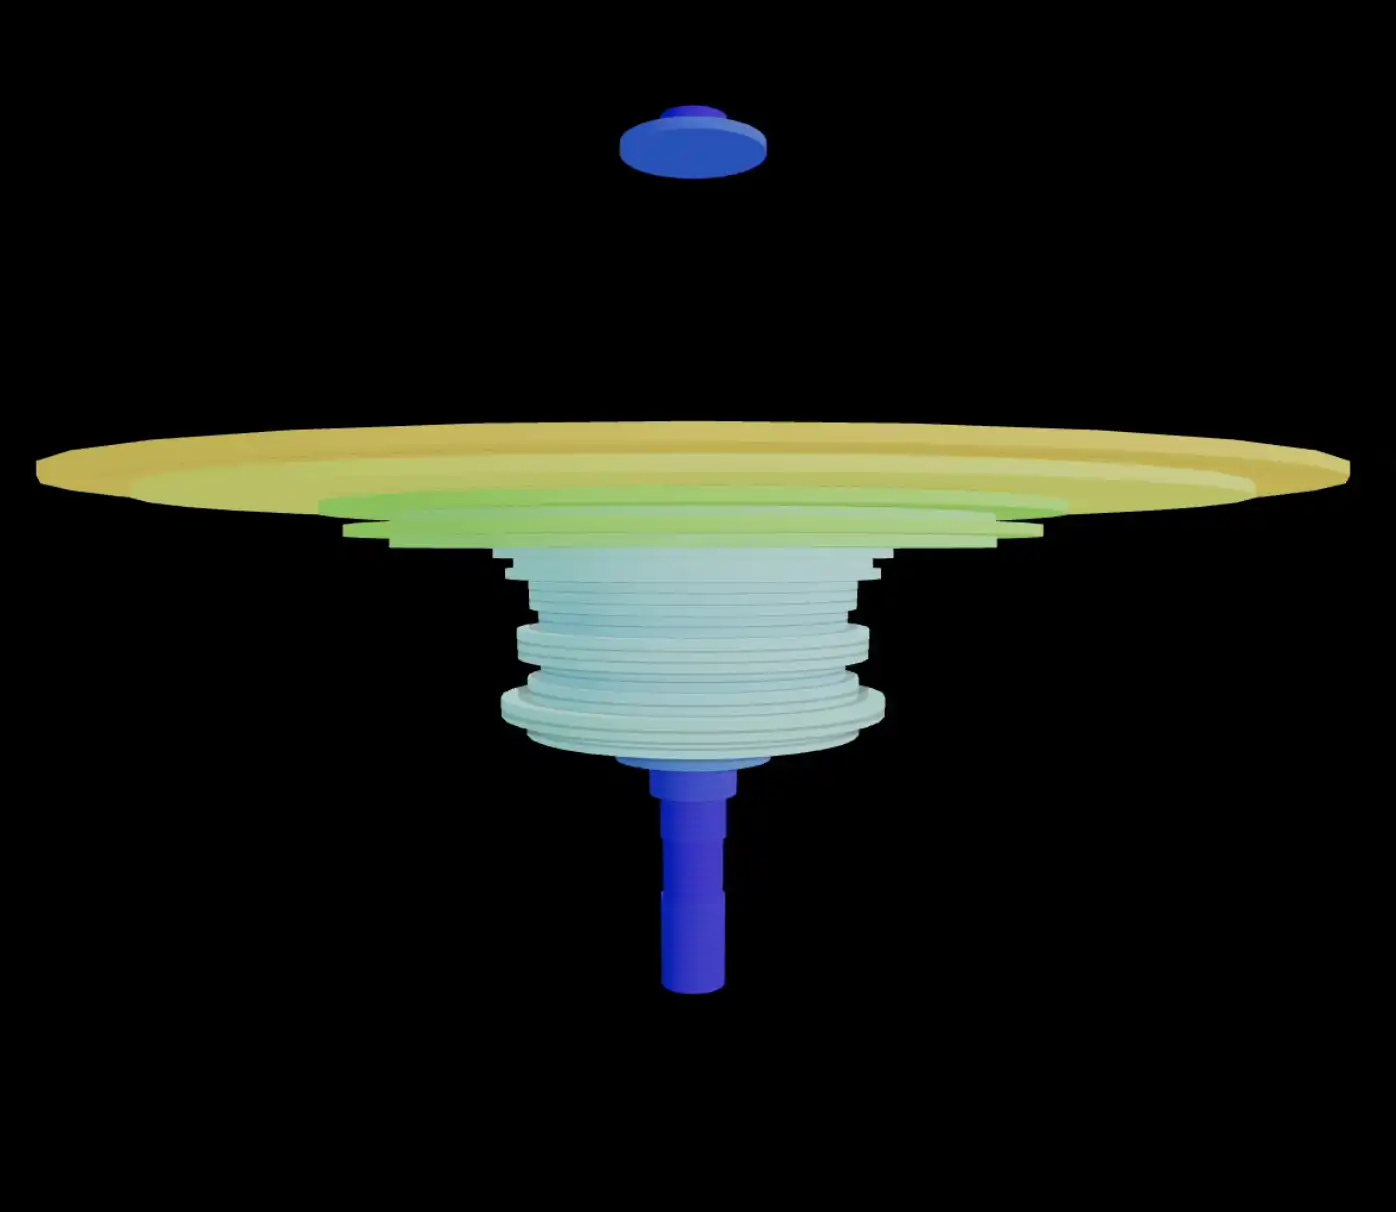
This is what it might look like. Apologies for the bad beat boxing, the terrible tuvan-style throat singing, and, as always, apologies to Alfredo Olivas for butchering one of his songs yet again. But, hey, the visualization is pretty cool.
This is now the default embed for audio files uploaded to zPages, Converse, Chat2Z and elsewhere. By default a little miniature version pops up. If you click on it, you can get an immersive fullscreen:
Architecture
First things first, let's talk about the big decision – using the default audio player and splitting the tasks of playing and visualizing. Revolutionary, right? Well, maybe not, but it sure makes things cleaner and more manageable.
import React, { useRef, useEffect, useState } from 'react';import { Box, Stack } from '@mui/material'; import AudioVisualizerCanvas from './AudioVisualizerCanvas'; const FFT_SIZE = 1024const CANVAS_HEIGHT = 150; type AudioVisualizerProps = { src: string} const AudioVisualizer: React.FC<AudioVisualizerProps> = ({ src }) => { const audioRef = useRef<HTMLAudioElement>(null); const audioContextRef = useRef<AudioContext | null>(null); const analyserRef = useRef<AnalyserNode | null>(null); const dataArrayRef = useRef<Uint8Array | null>(null); const [isAudioPlaying, setIsAudioPlaying] = useState(false); const handleAudioPlay = async () => { if (!audioContextRef.current && audioRef.current) { try { const audioContext = new AudioContext(); audioContextRef.current = audioContext; const track = audioContext.createMediaElementSource(audioRef.current); const analyser = audioContext.createAnalyser(); analyser.fftSize = FFT_SIZE; const bufferLength = analyser.frequencyBinCount; const dataArray = new Uint8Array(bufferLength); analyserRef.current = analyser; dataArrayRef.current = dataArray; track.connect(analyser); analyser.connect(audioContext.destination); setIsAudioPlaying(true); } catch (error) { console.error('Error setting up audio context:', error); } } }; useEffect(() => { const audioEl = audioRef.current; if (audioEl) { audioEl.addEventListener('play', handleAudioPlay); return () => { audioEl.removeEventListener('play', handleAudioPlay); }; } }, []); return ( <Box component="div" display="flex" justifyContent="center" alignItems="center" > <Stack direction="column" spacing={0} alignItems="center" maxWidth="100%" > {isAudioPlaying && ( <Box component={"div"} sx={{ width: "100%", height: CANVAS_HEIGHT, flexGrow: 1, }} > <AudioVisualizerCanvas dataArrayRef={dataArrayRef} analyserRef={analyserRef} /> </Box> )} <audio ref={audioRef} crossOrigin="anonymous" controls src={src} ></audio> </Stack> </Box> )}; export default AudioVisualizer;Here's the gist: We've got a React component that takes an audio source url and does two things:
Plays the audio with a ref to the native HTML audio element. Because who needs fancy when you can have functional? Creates an AudioContext and an AnalyserNode to do the heavy lifting for the visualizations. It's like having a backstage pass to the inner workings of the audio.
Now, the cool part: When the audio plays, we kick off the handleAudioPlay function, setting up the audio context and connecting our analyser. This is where we say goodbye to bland and hello to fabulous!
The Visual Masterpiece
Now, onto the star of the show – the visualization! We're using @react-three/fiber for some WebGL magic. Get ready for some serious eye candy. 🤪
import React, { useRef, useEffect, useState } from 'react';import { Canvas } from '@react-three/fiber';import { Mesh } from 'three';import RotatingCamera from './RotatingCamera'; const FFT_SIZE = 1024; // Visualization constantsconst Y_OFFSET = 0.25;const NUM_BARS = 128;const BAR_WIDTH = 0.001;const BAR_HEIGHT = 0.05;// const BAR_DEPTH = 0.001;const BAR_SPACING = 0.0001;const MAX_SCALE = 3500;const AMPLITUDE_NORMALIZER = 256.0; // Normalizes the amplitude valuesconst HALF_BARS = NUM_BARS / 2; type VisualizerProps = { dataArrayRef: React.RefObject<Uint8Array>; analyserRef: React.RefObject<AnalyserNode>;}; const mapAmplitudeToColor = (amplitude: number): string => { // Interpolating the hue value from blue (240) to red (0) const hue = 240 - (amplitude * 240); return `hsl(${hue}, 100%, 50%)`;}; const Bar: React.FC<{ position: [number, number, number], scale: [number, number, number], color: string,}> = ({ position, scale, color }) => { const meshRef = useRef<Mesh>(null); const borderMeshRef = useRef<Mesh>(null); useEffect(() => { if (meshRef.current && borderMeshRef.current) { meshRef.current.scale.set(scale[0], scale[1], scale[2]); borderMeshRef.current.scale.set(scale[0] * 1.01, scale[1] * 1.01, scale[2] * 1.01); } }, [scale]); return ( <> {/* https://threejs.org/docs/#api/en/geometries/CylinderGeometry */} <mesh ref={borderMeshRef} position={position}> <cylinderBufferGeometry args={[BAR_WIDTH * 1.05, BAR_WIDTH * 1.05, BAR_HEIGHT * 1.05, 32]} /> <meshStandardMaterial color={'black'} transparent opacity={0.15} /> </mesh> <mesh ref={meshRef} position={position}> <cylinderBufferGeometry args={[BAR_WIDTH, BAR_WIDTH, BAR_HEIGHT, 32]} /> <meshStandardMaterial color={color} /> </mesh> </> );}; const AudioVisualizerCanvas: React.FC<VisualizerProps> = ({ dataArrayRef, analyserRef }) => { const [bars, setBars] = useState<Array<{ scale: [number, number, number], color: string, }>>(Array(NUM_BARS).fill({ scale: [1, 1, 1], color: 'hsl(0, 100%, 50%)', })); const animateRAF = useRef<number>(0); const mapBarToFrequencyBin = (index: number, totalBars: number, sampleRate: number) => { const minHz = 22.5; const maxHz = sampleRate; const indexNormalized = index / totalBars; // Using a logarithmic scale to allocate more bars to lower frequencies const exponent = (Math.log(maxHz / minHz) * indexNormalized); const freq = minHz * Math.exp(exponent); const bin = Math.floor(freq / sampleRate * FFT_SIZE); return bin; }; const animate = () => { if (analyserRef.current && dataArrayRef.current) { analyserRef.current.getByteFrequencyData(dataArrayRef.current); const sampleRate = analyserRef.current.context.sampleRate; const newScales = Array.from({ length: NUM_BARS }, (_, index) => { const binIndex = mapBarToFrequencyBin(index, NUM_BARS, sampleRate); const amplitude = dataArrayRef.current ? dataArrayRef.current[binIndex] : 0; const normalizedAmplitude = amplitude / AMPLITUDE_NORMALIZER; const scale = normalizedAmplitude * MAX_SCALE; const color = mapAmplitudeToColor(normalizedAmplitude); return { scale: [scale, 1, scale] as [number, number, number], color }; }); setBars(newScales); } animateRAF.current = requestAnimationFrame(animate); }; useEffect(() => { animate(); return () => { if (animateRAF.current) { cancelAnimationFrame(animateRAF.current); } }; }, []); const barPositions = Array.from({ length: NUM_BARS }, (_, i) => { const yPos = (i - HALF_BARS) * (BAR_HEIGHT + BAR_SPACING) + Y_OFFSET; // const zPos = (i - HALF_BARS) * (BAR_DEPTH + BAR_SPACING); const zPos = i / NUM_BARS * 2 return [0, yPos, zPos] as [number, number, number]; }); const requestFullScreen = (element: HTMLElement) => { if (element.requestFullscreen) { element.requestFullscreen(); } }; return ( <Canvas onClick={(ev) => requestFullScreen(ev.currentTarget)} style={{ cursor: 'pointer', // background: 'black', }} > <ambientLight /> <pointLight position={[10, 10, 10]} /> {bars.map((bar, index) => ( <Bar key={index} position={barPositions[index]} scale={bar.scale} color={bar.color} /> ))} <RotatingCamera /> </Canvas> );}; export default AudioVisualizerCanvas;This is where we turn sound into sight. We've got "bars" that dance to the music, changing color based on amplitude. It's like watching a rainbow groove to your favorite tunes. We map frequencies to bars using a logarithmic scale because linear is so last year. Actually, music and harmony are logarthmic. WebAudio by default does linear binning. But, that does really weird stuff like... half the bins are above 6000hz. Most music and speech and human stuff are below 2000hz. And octaves are logarthmic 220, 440, 880, 1760 ... so using a logarithmic distribution, I think each octave should take up the same amount of space ... 🤔
Each disk is a Bar component (creative naming, right?) that takes its position, scale, and color. The scale and color change based on the amplitude of the audio at that frequency. It's like each bar has its own personality, just like us developers – some are loud and bright, others more subdued.
Concluding
So, what have we learned besides the fact that our old player was as bland as unsalted crackers? This journey wasn't just about building a cool audio visualizer. It was about transforming our dull audio experience into something vibrant and alive. And maybe, just maybe, it was about having a little fun along the way. After all, who says coding can't be a blast? So, to all my fellow code whisperers out there, I leave you with this: May your bugs be few, your coffee strong, and your audio visualizers as colorful as your imagination. Happy coding! 🚀💻🎶
PS: drop some mp3s in an
::embeddirective in the comments below to brighten everyone's day.