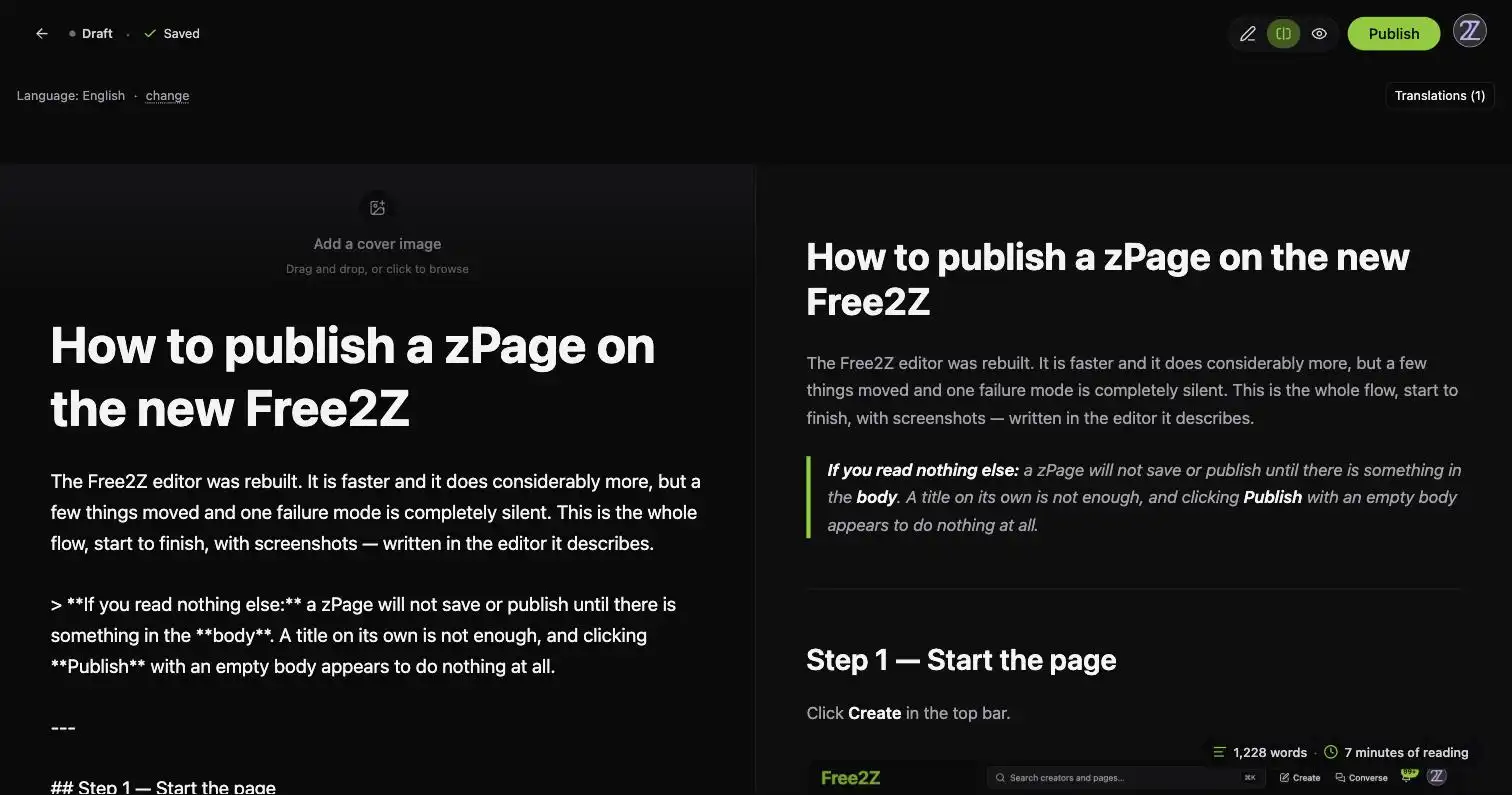

The Free2Z editor was rebuilt. It is faster and it does considerably more, but a few things moved and one failure mode is completely silent. This is the whole flow, start to finish, with screenshots — written in the editor it describes.
If you read nothing else: a zPage will not save or publish until there is something in the body. A title on its own is not enough, and clicking Publish with an empty body appears to do nothing at all.
Step 1 — Start the page
Click Create in the top bar.
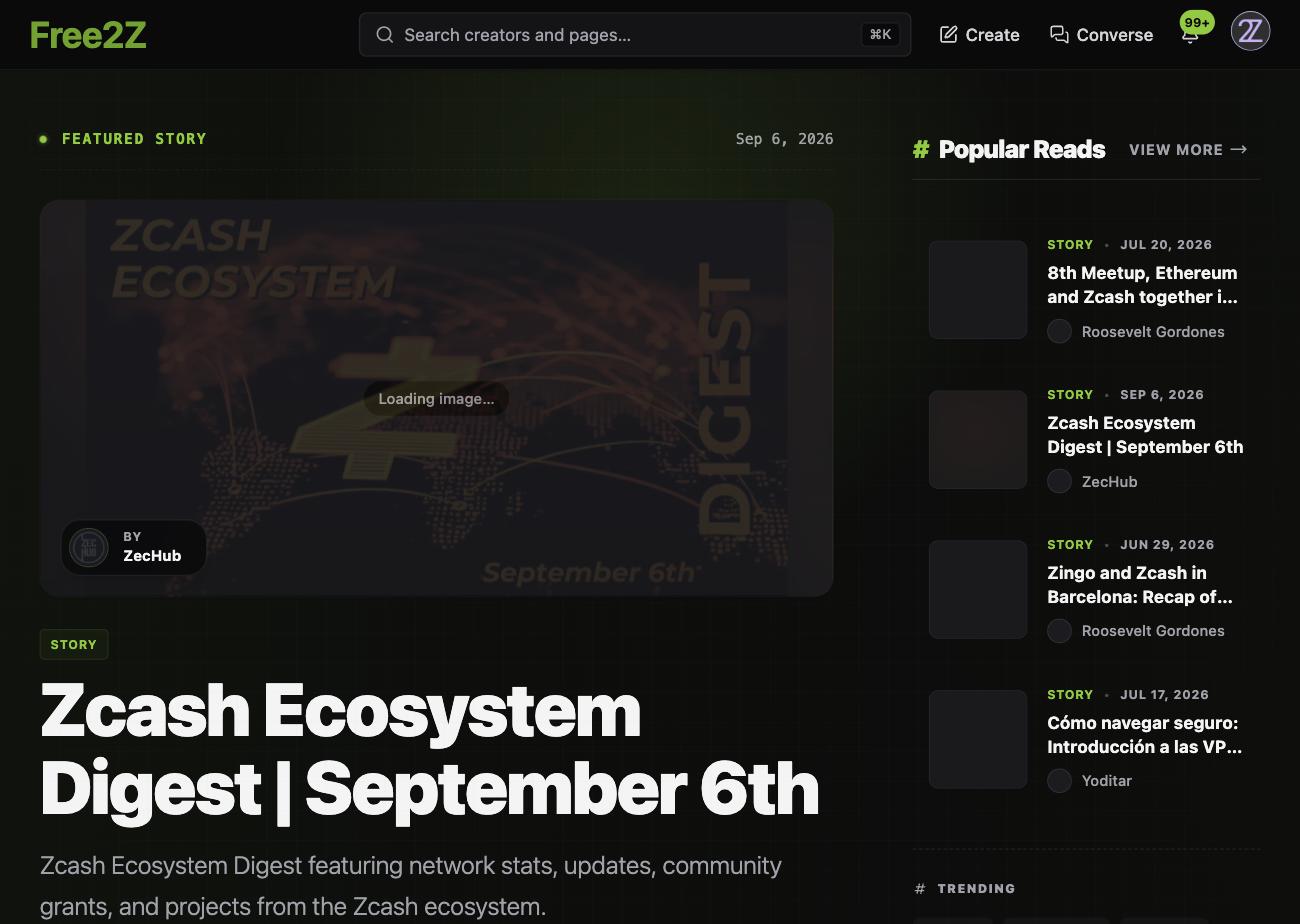
There is no separate "new zPage" screen any more. Create drops you straight into an empty draft at free2z.cash/edit. You can also start one from your own profile page with the New Article button.
Step 2 — Know the editor
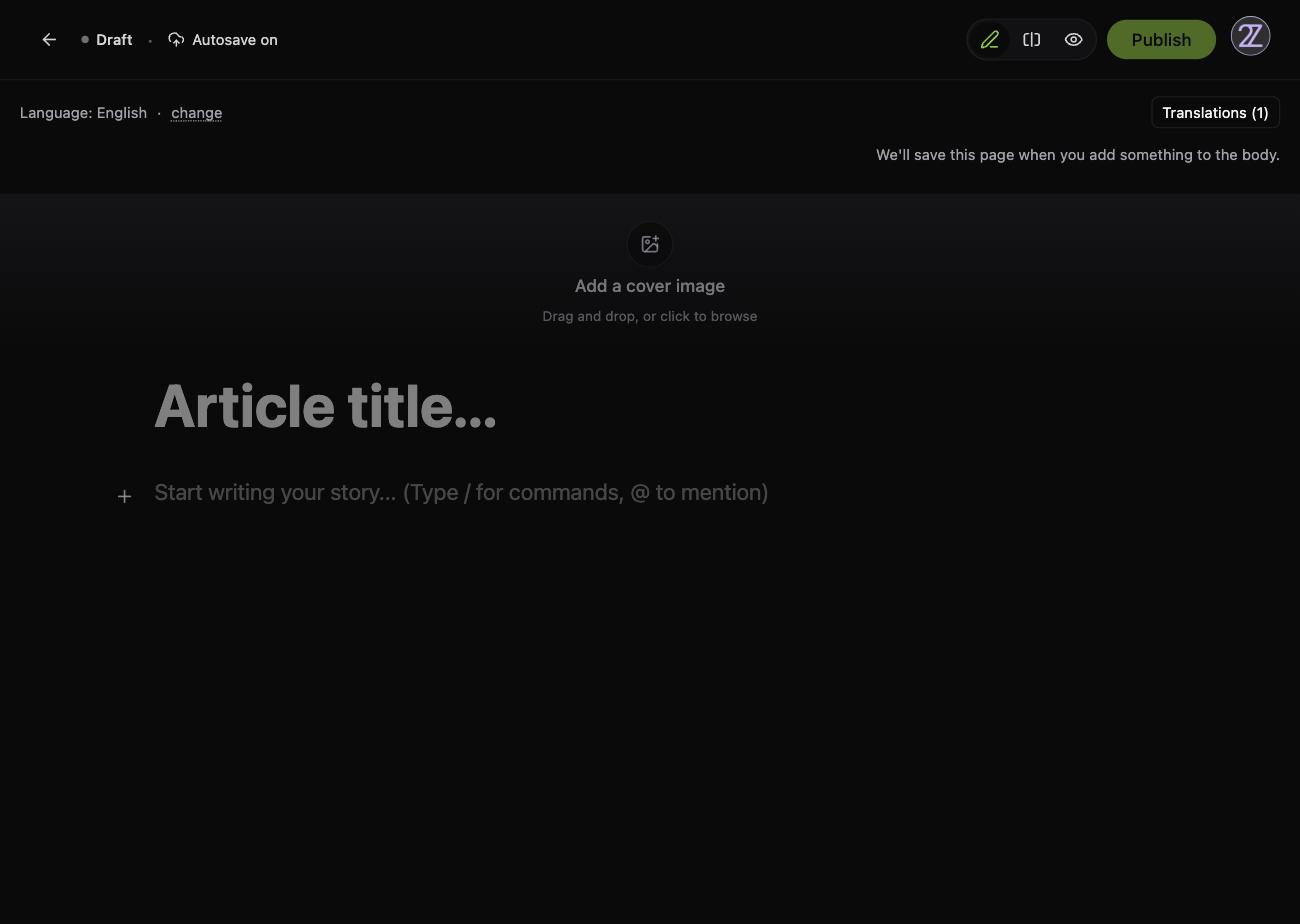
Top left is the save state, and it is worth watching. It moves through Autosave on → Unsaved changes → Saved. The back arrow beside it leaves the editor.
Top right, four controls:
- Pencil — edit mode. This is where you type.
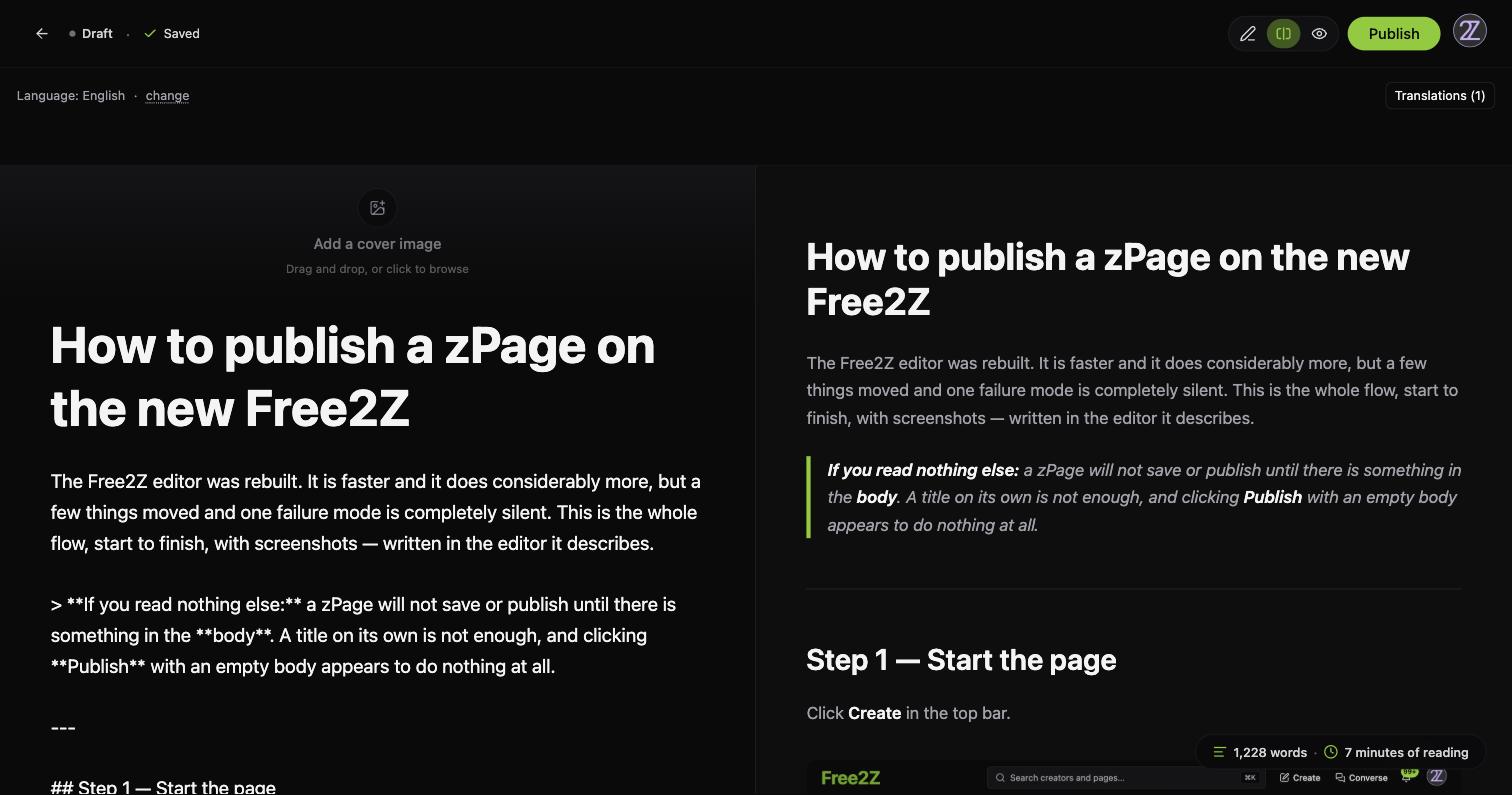
- Split panes — editor on the left, live preview on the right.
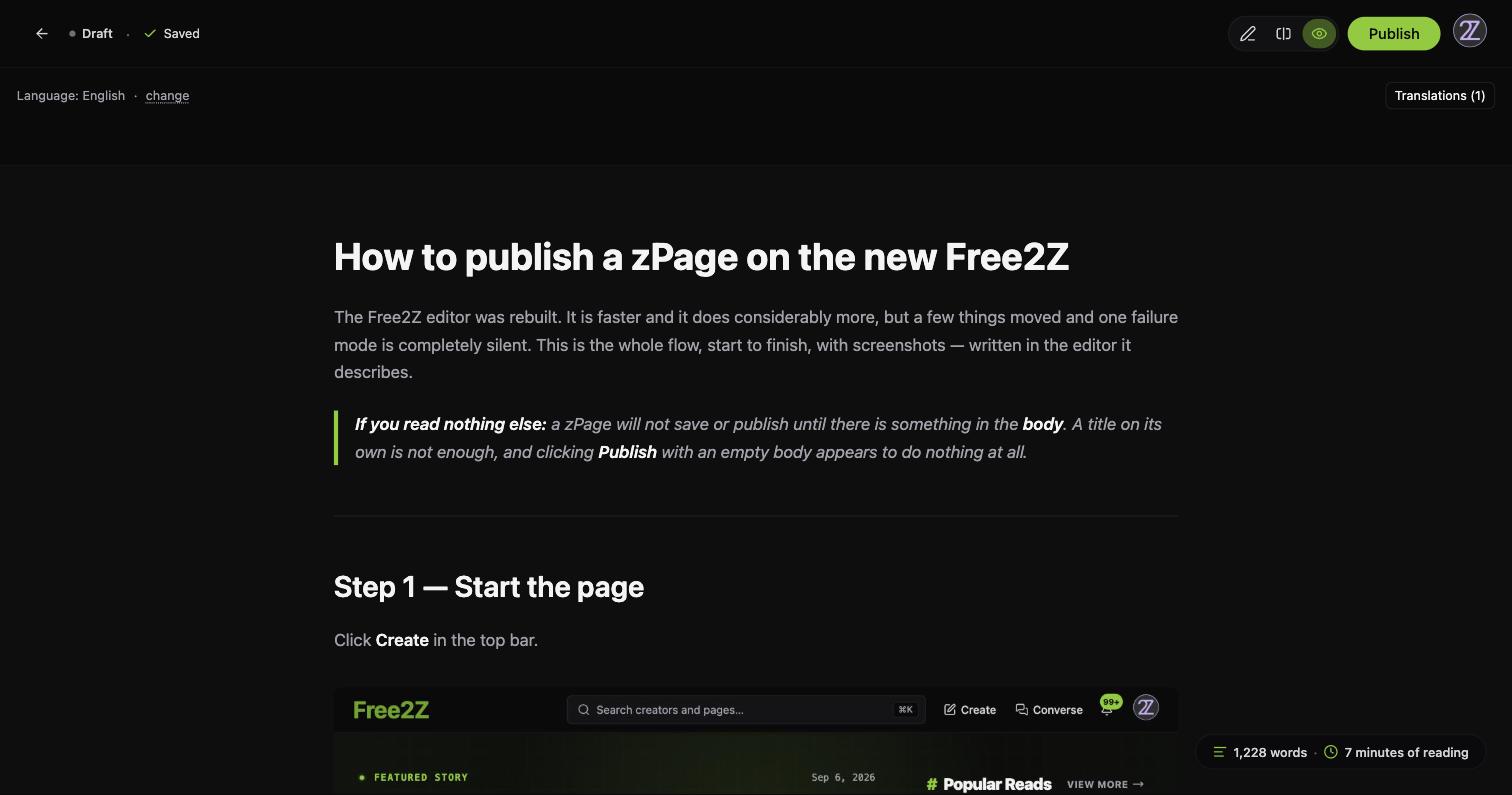
- Eye — full preview, exactly what a reader will see.
- Publish — opens the publish panel.
One thing that is not obvious from looking at it: the body is Markdown. If you already write Markdown, just type it. ##, **bold**, - lists, backtick code, links, tables and images all work exactly as you expect. If you don't, the / menu writes the Markdown for you.
Step 3 — Title and cover image
Click Article title... and type. The title is required — with it empty, hovering Publish tells you so.
Above the title is the cover image strip. Click it and you get three ways to fill it:
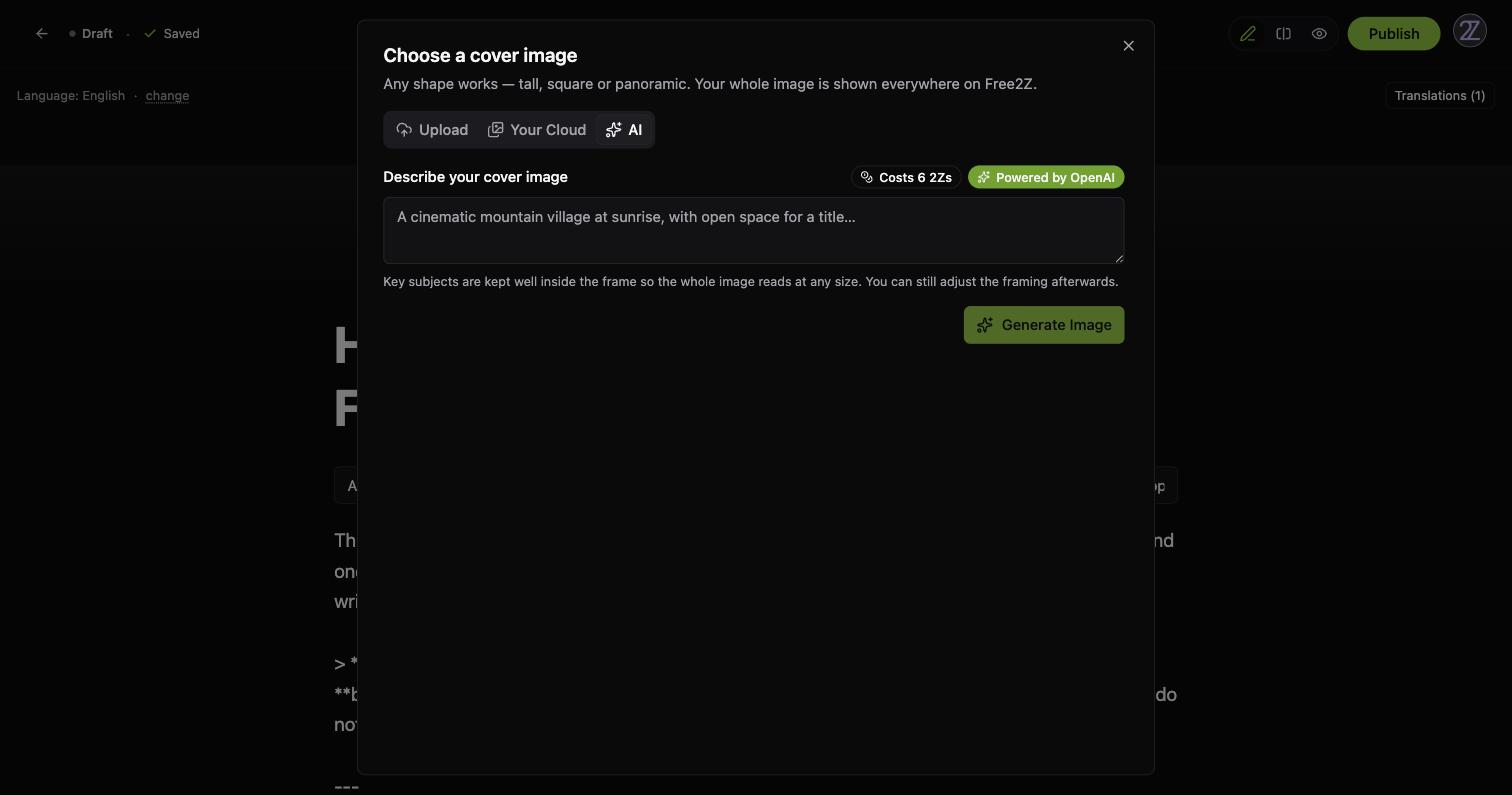
- Upload — drop a file in or pick one from your device.
- Your Cloud — reuse an image you have already uploaded.
- AI — describe the cover you want and have one generated. It costs 6 2Zs.
Whatever you choose, you get a confirmation step showing how the image will look as a thumbnail, as a card and as the article hero. Your whole image is used — Free2Z pads it to fit rather than cropping it — and Adjust framing is there if you want to crop it yourself.
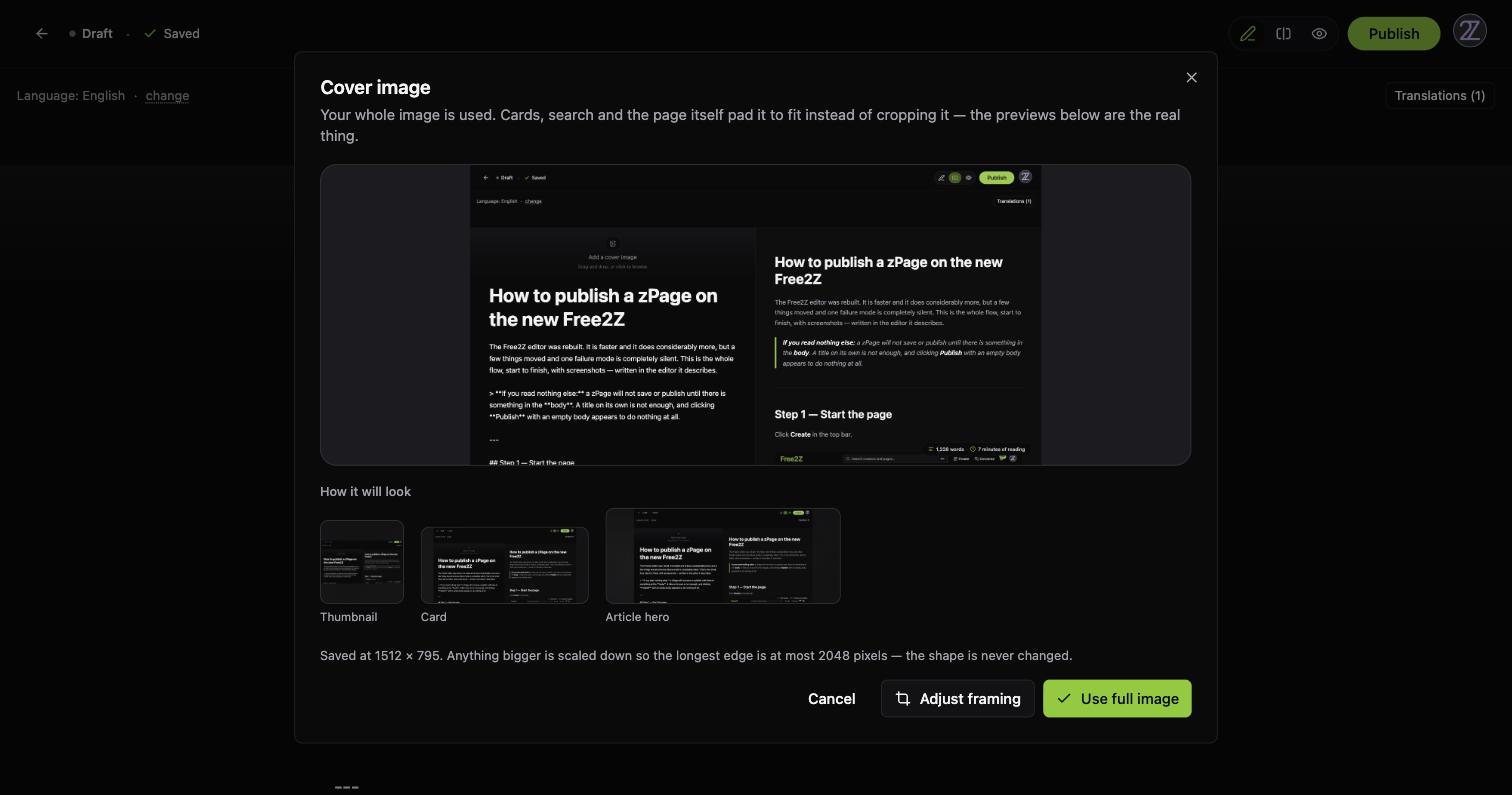
The cover is optional, but it is what shows on cards in the feed, in search results and on social shares, so it is worth adding.
Step 4 — Write the body
Click below the title and start typing. For anything that is not a plain paragraph, either type / or click the + in the left margin.
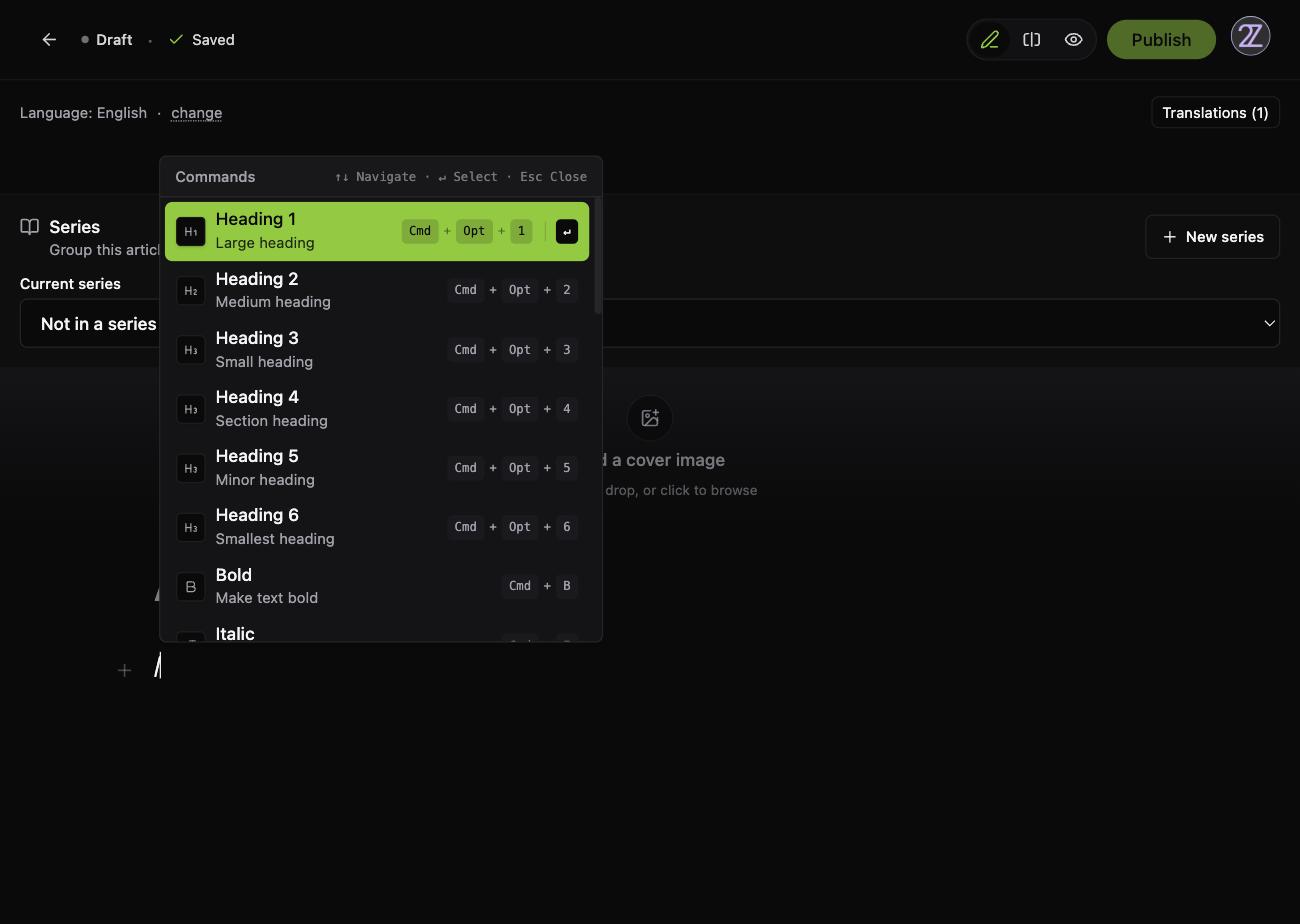
The menu is searchable: type /quo and you get Quote. Arrow keys navigate, Enter selects, Esc closes. Most entries also list a keyboard shortcut, so you can skip the menu once you know them.
Everything / can insert:
Text and structure — Heading 1 through 6, Bold, Italic, Strikethrough, Inline code, Quote, Bullet list, Numbered list, Task list, Link, Table, Divider, Footnote
Code and maths — Code block, Numbered code block (line numbers plus highlighted lines), Mermaid diagram, Inline math, Math block. The last two are LaTeX.
Media and embeds — Image, Embed, Audio embed, Iframe, QR code
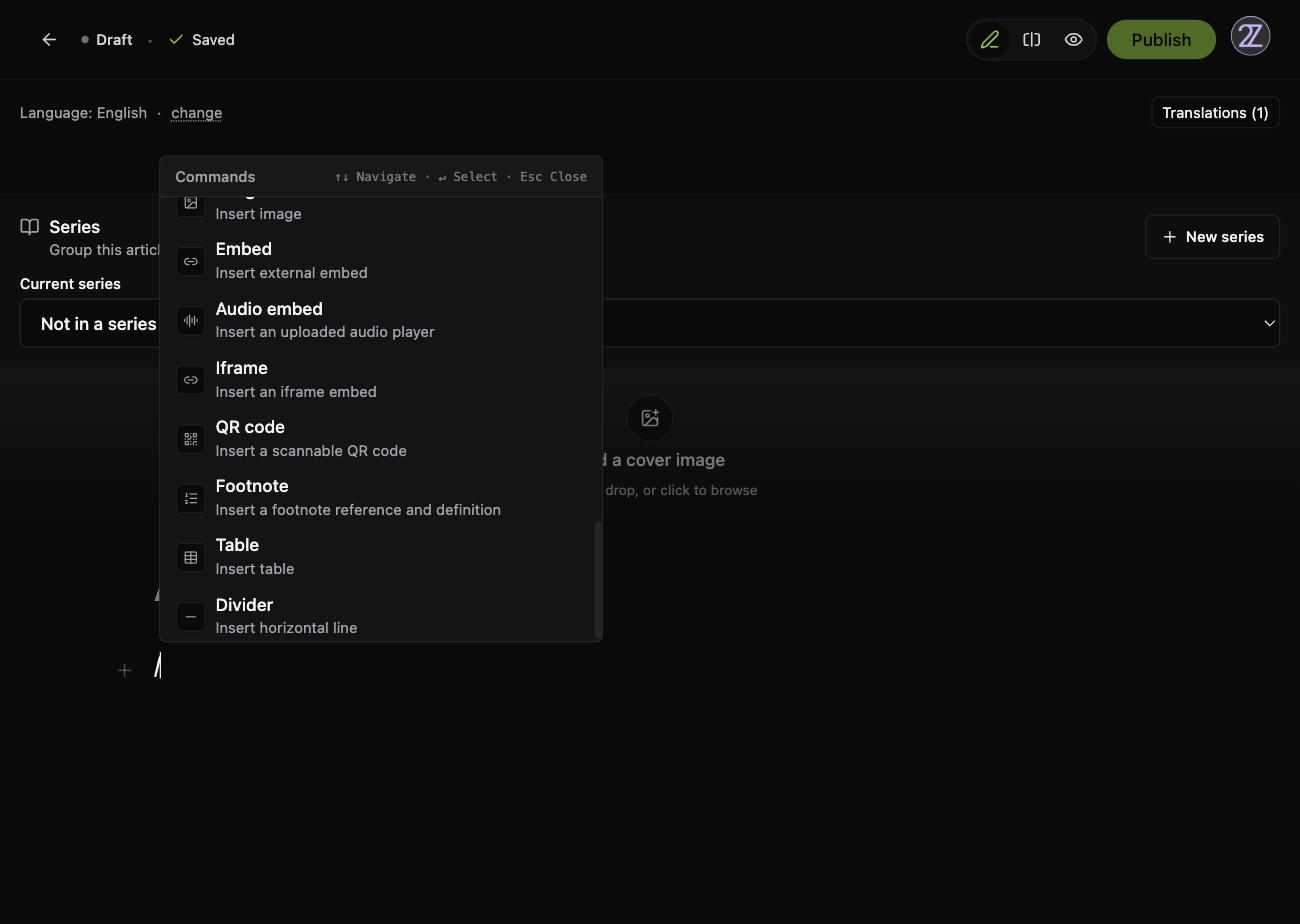
Typing @ instead of / mentions another creator.
Adding images
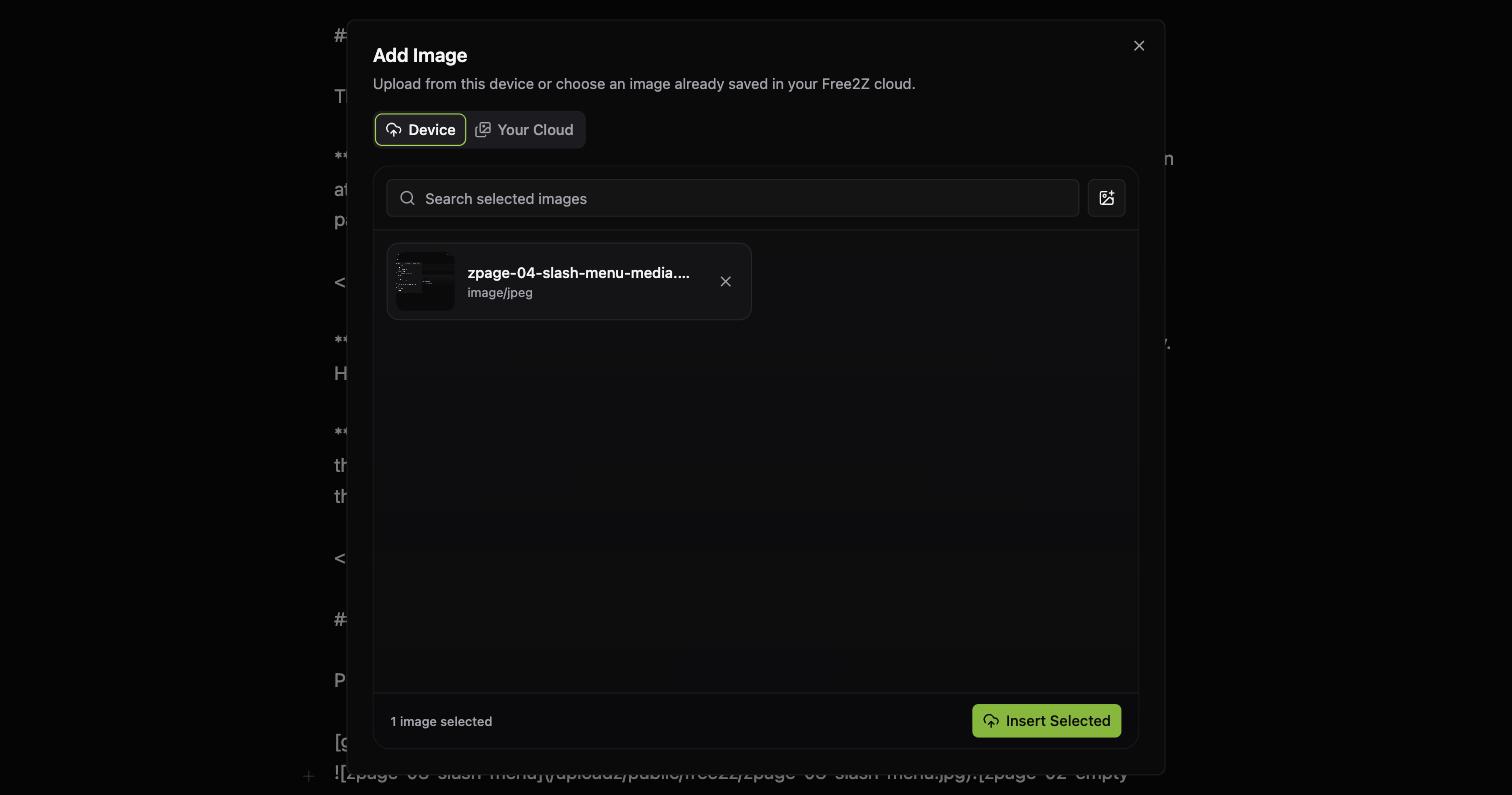
/image opens the Add Image dialog, which has two tabs.
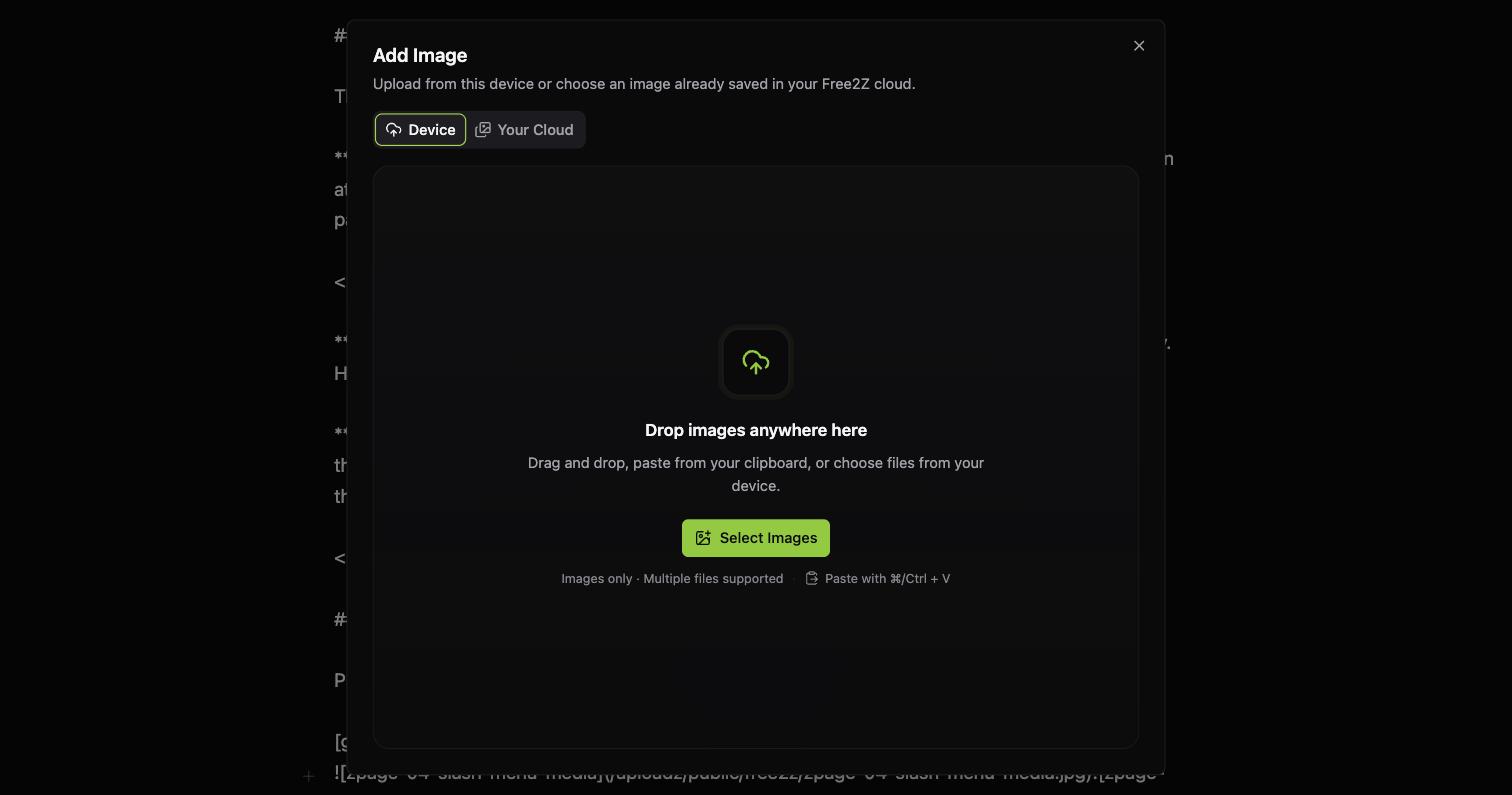
- Device — drag files in, paste from your clipboard with Cmd/Ctrl+V, or click Select Images. Several at once is fine.
- Your Cloud — everything you have already uploaded to Free2Z, so you never have to upload the same image twice.
Pick what you want, then click Insert Selected.
Step 5 — Check it before it goes out
The split-pane button gives you the editor and the rendered page side by side, which is the fastest way to write.
The eye gives you the full reader view, with nothing of the editor left on screen.
Step 6 — Publish
Publish slides a panel in from the right. Every field in it is optional.
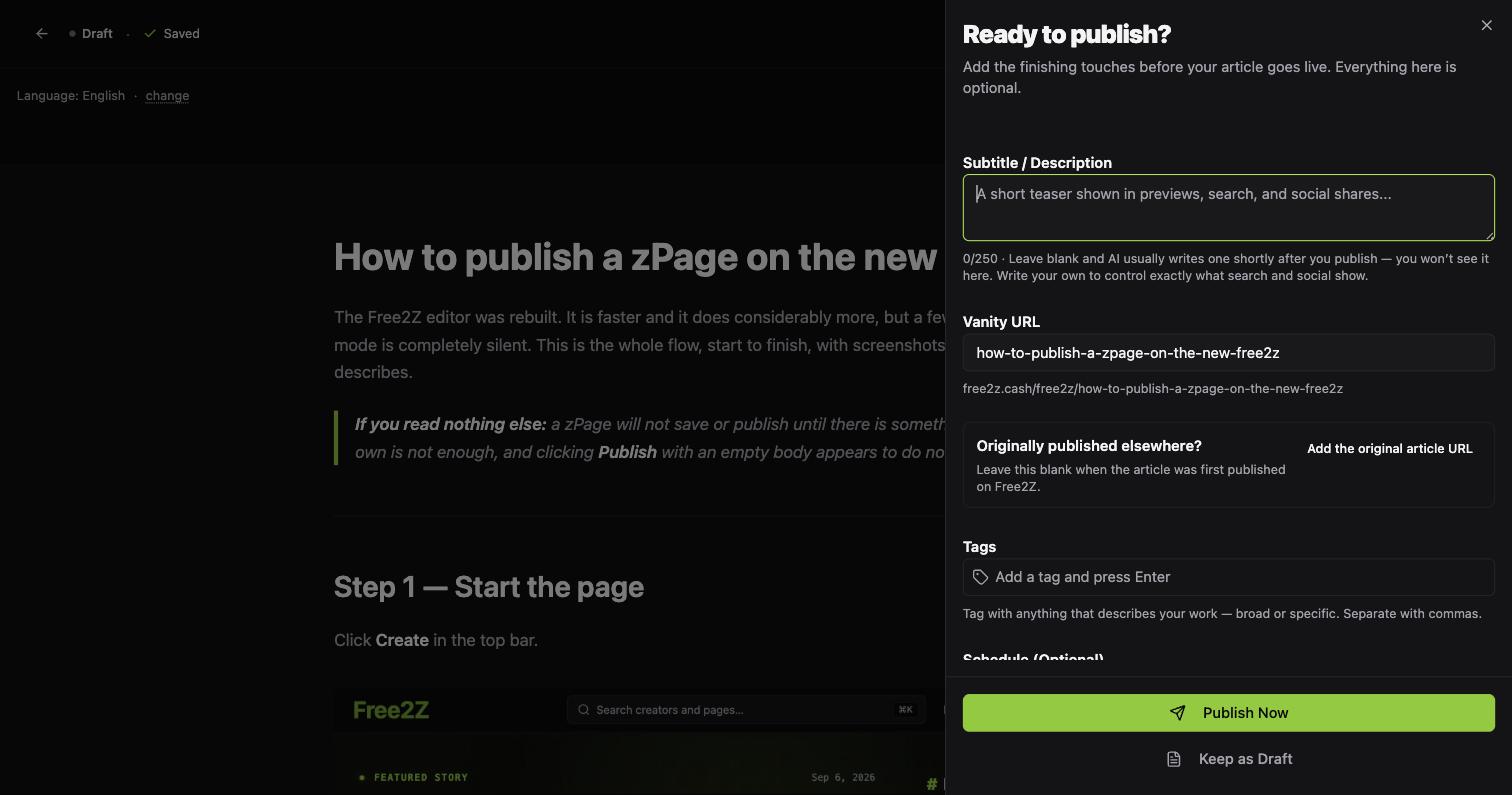
- Subtitle / Description — up to 250 characters. Leave it blank and one is generated for you shortly after publishing, which you will not see here. Write your own if you want to control exactly what search engines and social cards show.
- Vanity URL — prefilled from your title. Edit it for a shorter link; the full address is shown underneath as you type.
- Originally published elsewhere — the canonical URL, if this piece ran somewhere else first. Leave it blank for original work.
- Tags — type and press Enter, or separate with commas. Broad or specific, both are useful.
- Schedule — leave it empty to publish immediately, or pick a date and time. Times are shown in your own timezone.
- Zcash Address (Optional Override) — a per-page payment address, if you want this one page to pay somewhere other than your profile address.
- Subscribers Only — restricts the page to people who subscribe to you.
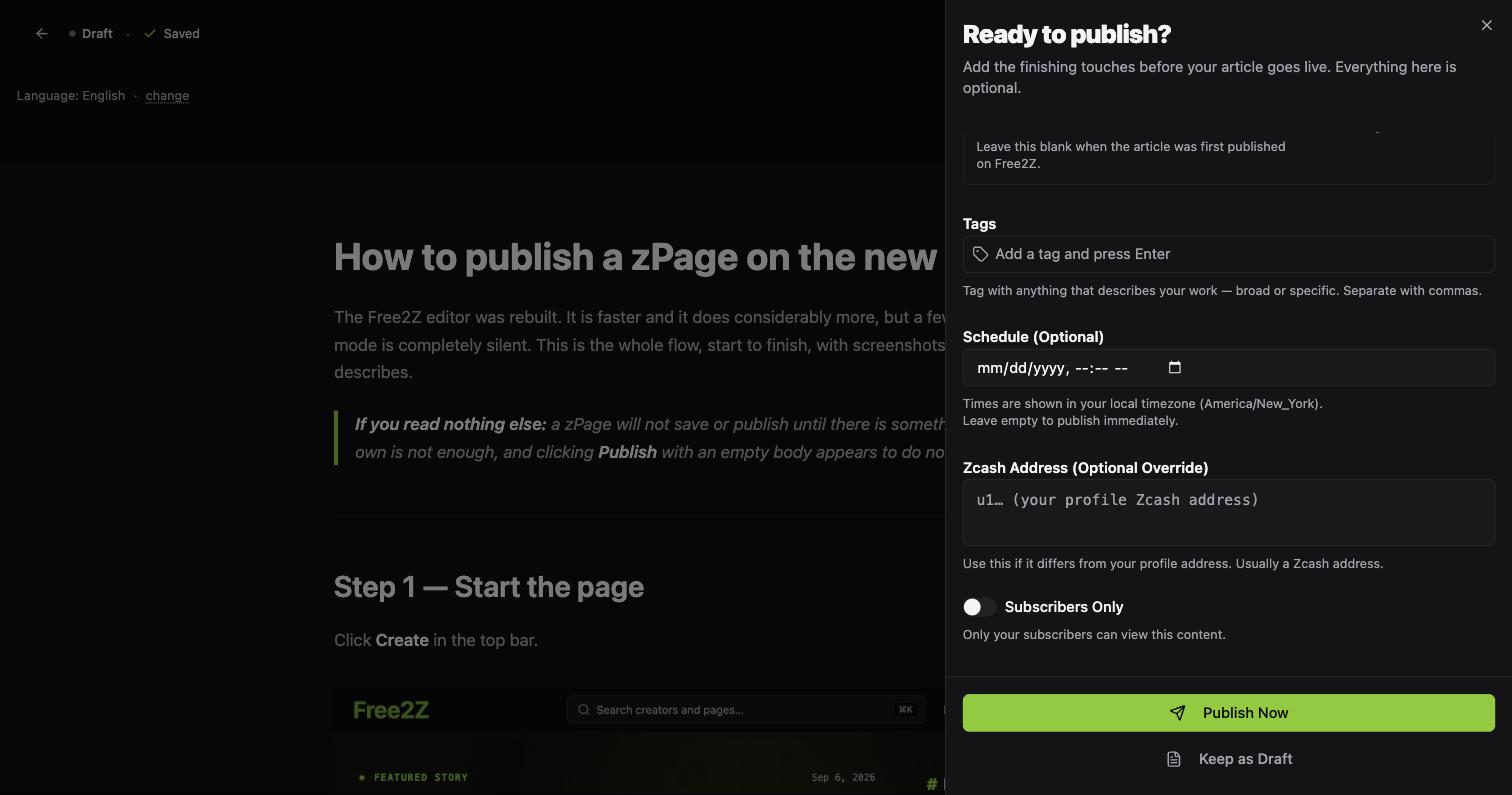
Then Publish Now. Or Keep as Draft, which saves everything you just filled in without putting the page live — useful when you have written the description and tags but want another read first.
Two more things in the editor
Both live at the very top of the editor, above the cover image, so they are easy to scroll straight past.
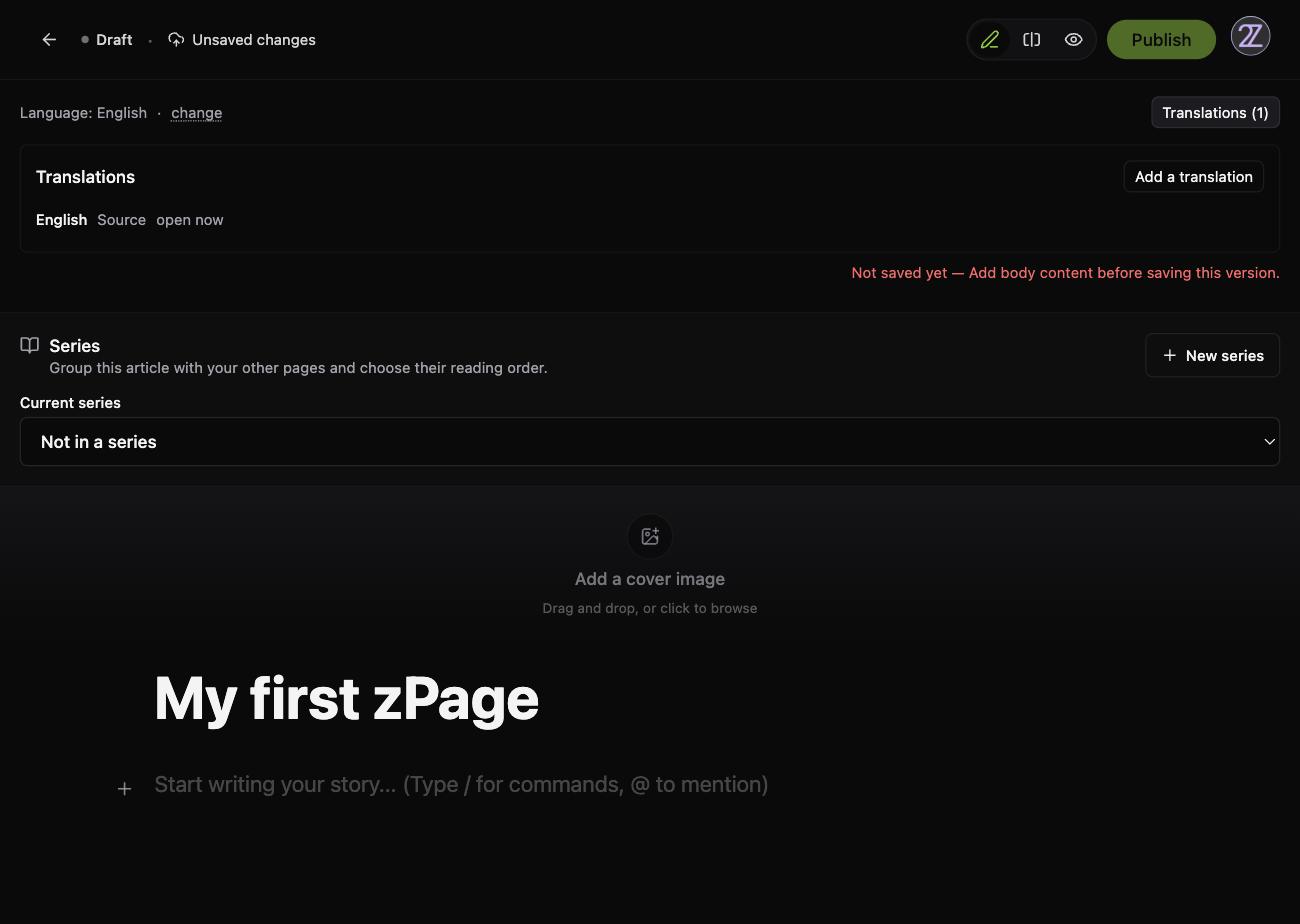
Series groups a page with your other pages and sets their reading order. If you are writing something in parts, set it here rather than trying to link the pieces by hand.
Translations shows which languages this page exists in and lets you add another. The source language is set by the Language: English · change control at the top left.
Where your drafts live
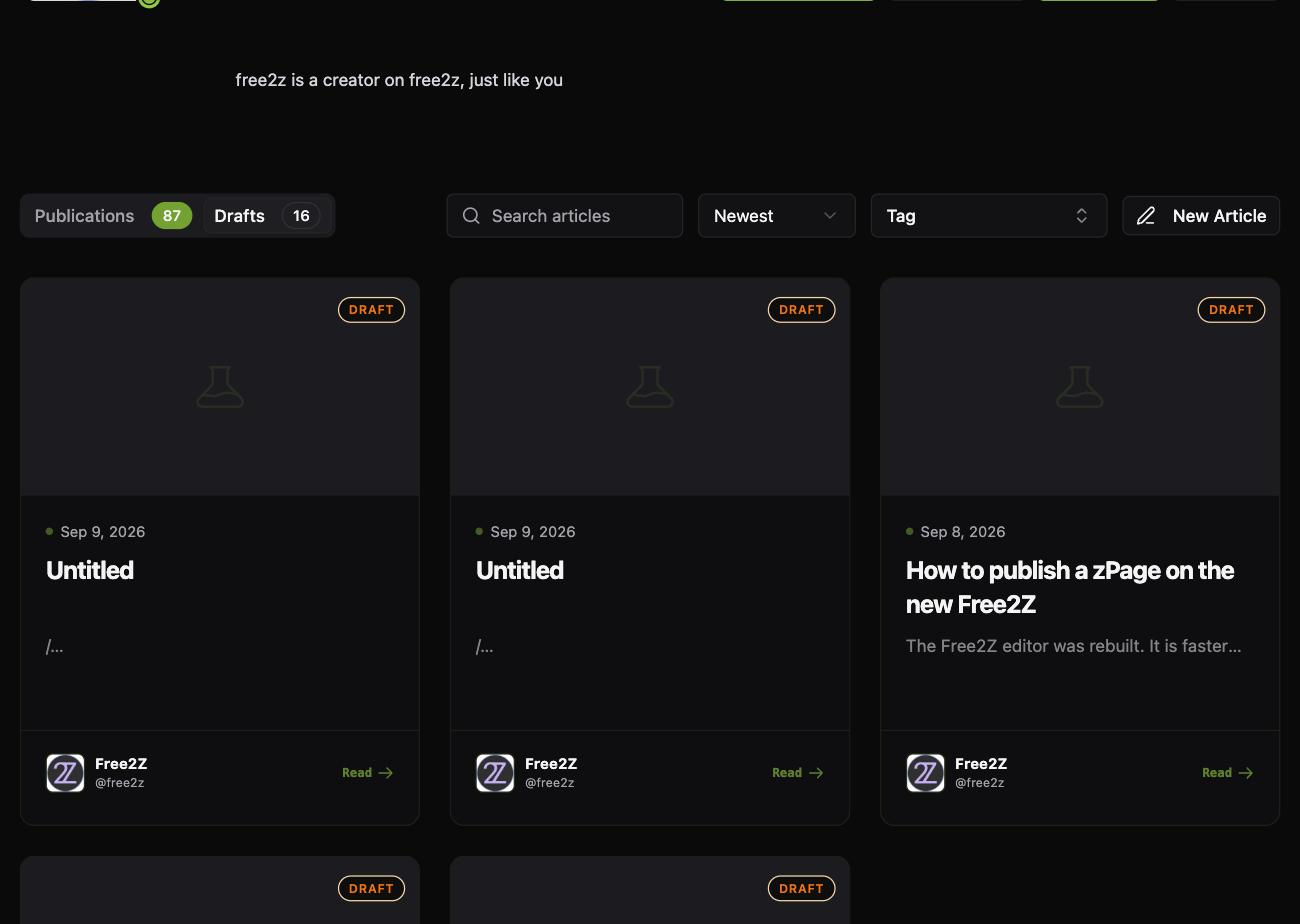
Not in the avatar menu — this is the one people hunt for. Go to your profile, and there is a Drafts tab next to Publications. Hover any draft card and you get Continue Writing.
If Publish seems broken
Three things account for almost all of it.
1. You clicked Publish and nothing happened. The body is empty. The publish panel will not open at all until there is something in it. The only hint is a line of red text under the top bar: Not saved yet — Add body content before saving this version.
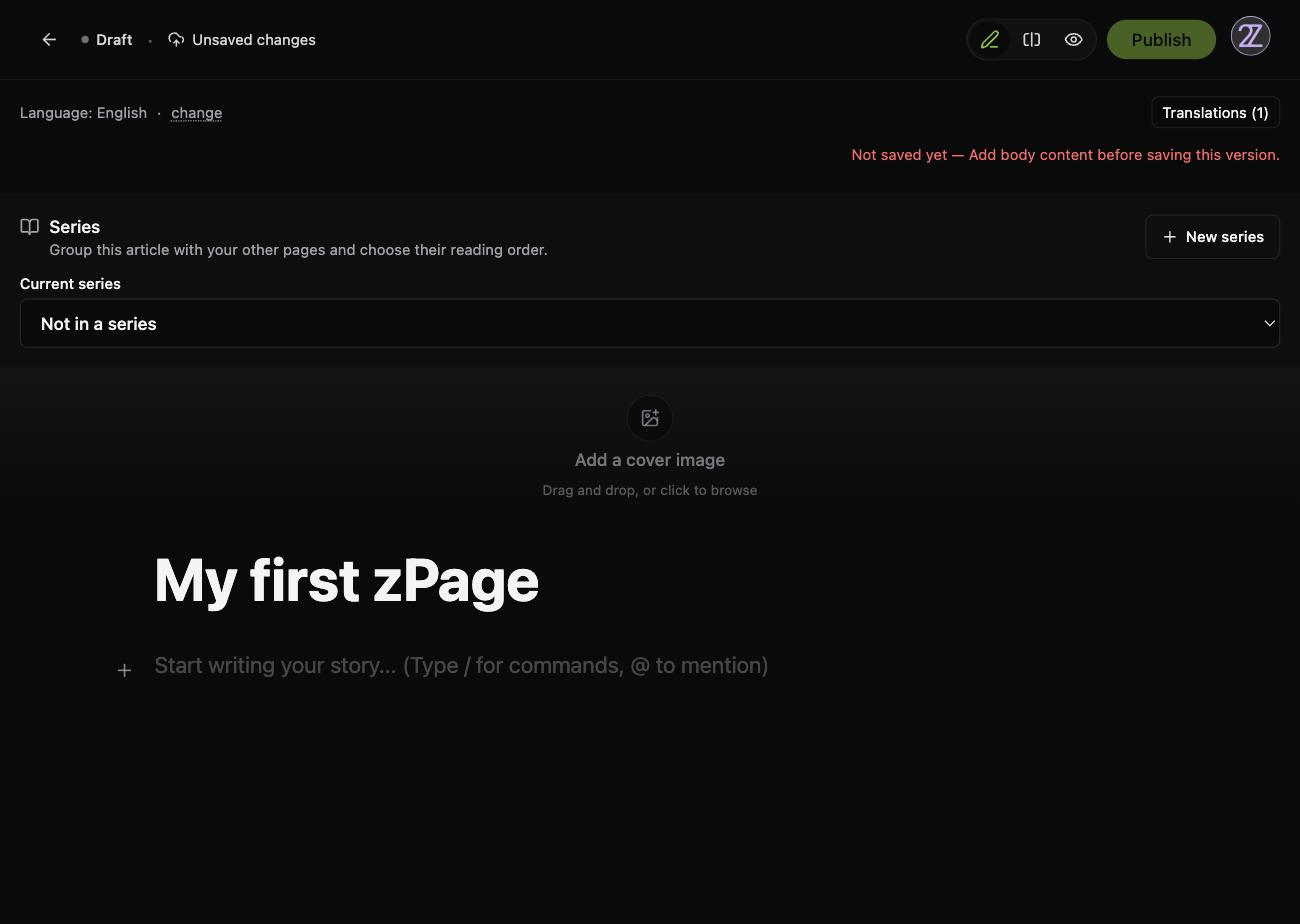
2. Same thing, but the body is not empty. Then the title is empty. Hover Publish and it tells you so.
3. Your changes are not being saved. Autosave only starts once the body has content. Before that the editor says so plainly: We'll save this page when you add something to the body. After that, the top-left indicator is the source of truth — wait for Saved before you close the tab.
Still stuck?
Please tell us, with a screenshot if you can. Every report genuinely does get read: