YWallet as a Cold Wallet
Hello free2z friends!
Following my previous failed attempt trying to create a cold wallet using hhanh00's zcash-cold-wallet, I'm back with this article, showing how to use YWalleet as a cold wallet.
What is a cold wallet (again)
From my previous article on this subject:
Definition
In a nutshell, a cold wallet, in the context of cryptocurrencies, is a wallet in which both the private keys, and the transaction signing are kept and done completly offline, with no internet or network connectivity.
You can read more here
How it works?
The ideia of a offline wallet for signing transactions is that you need to have two devices (PCs, laptops, smarthpones, etc...):
- One is connected to the internet
- A "watch-only" wallet is installed on this machine, this wallet can only see your transactions and wallet balance, it cannot directly spend any $ZEC, it can only prepare transactions to be signed and then broadcast the signed transaction.
- The other is said to be "air gapped", with no connection to the internet.
- This one is used for signing pre-constructed transactions using you private key. The prepared transaction should transfered to this offline machine in a secure way, like a USB thumb drive.
Let's start
Notes
For this tutorial, I'll be using YWallet for desktop PC, but the process of creating, synching and signing transactions should be the same on mobile devices. If you are transafering files to/from your mobile device, you'll probably need a USB OTG Dongle.
Getting YWallet
To get the lastest version of YWallet go to the releases page on their github and download the appropriate file to your operating system. Since I'm running Linux Mint, I'll download the AppImage file. (If you're running windows download the ywallet.zip file.
Creating the cold wallet
After you download the wallet executable, transfer a copy of it to your offline PC using a safe medium, like an USB thumb stick.
Generating a new account
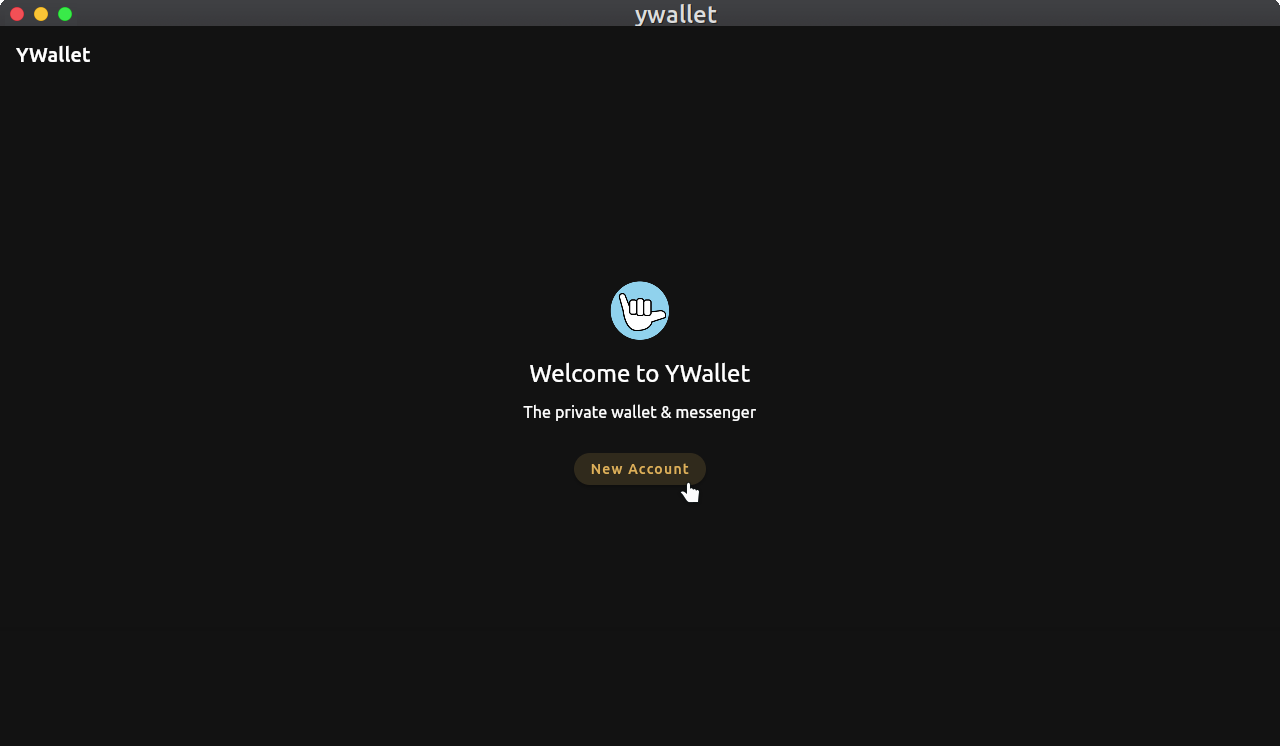
In your offline PC, start YWallet and then click on New account button.
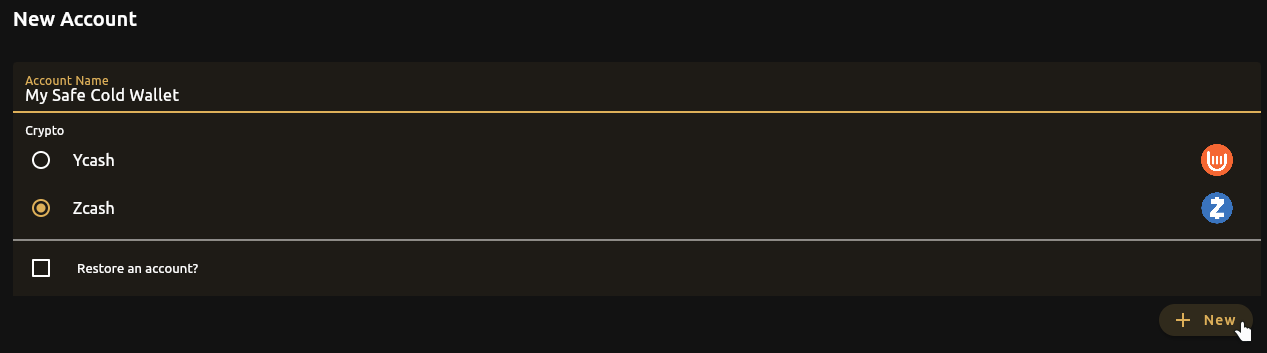
After that, you'll be on account creation screen, Give a name to your account, select Zcash as your Crypto and click on New button.
You'll be redirected to a screen showing your seed, secret and viewing keys. IMPORTANT: Keep this information stored in a safe place, without this information, you cannot restore your wallet!
Finally, click I have made a backup button to finish the wallet creation.
You will see some disclaimers, read them carefully and click OK.
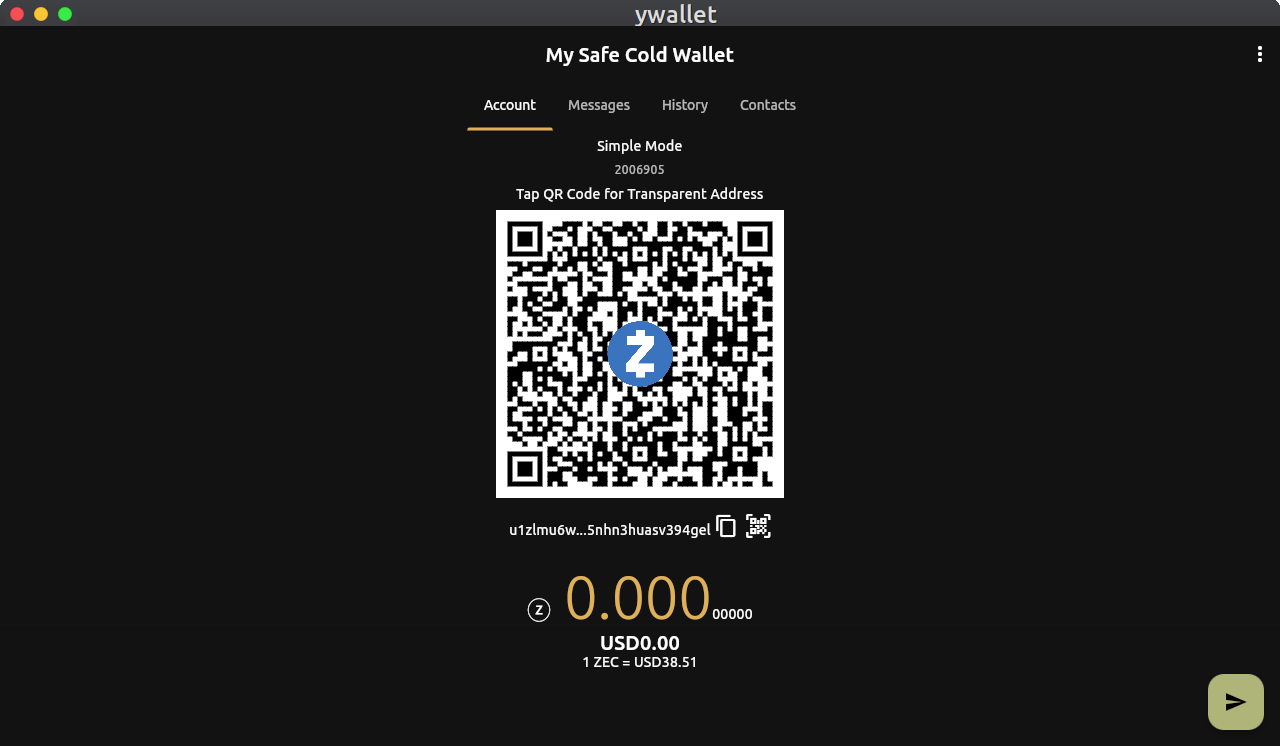
Now you should see your wallet main screen:
Switching to Advanced Mode
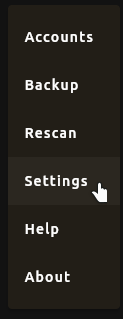
For you to be able to use YWallet as a cold wallet, you need to enable advanced mode. Click the three little vertical dots on the top-right corner of the wallet, and then select Settings
Inside the settings screen, find the Mode option, and switch it to Advanced.
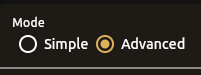
Click Ok to save the changes.
Also, since I'm using a PC for my cold wallet, I need the prepared transactions and raw signed transactions to be exported as files. Go back into the Settings screen, go to the bottom of the screen and deselect the Use QR for offline signing. Then click Ok to save the changes.
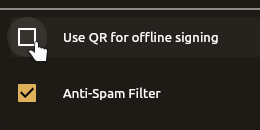
If you're using a mobile phone for your cold wallet, you can keep this checkbox ticked, and use your camera to transfer the data via QR Codes.
Done! Your offline, air gapped PC is properly configured! Let 's go to the next step.
Creating a Watch-only account
Now, let's go to your online PC, where you should create a safe watch-only account. This account will keep track of your balance and transactions, but cannot transfer any $ZEC directly.
In your online PC, fire up YWallet, and you'll be prompted to create a new account. click the button to create it.
Now, be careful, instead of creating a fresh wallet, you need to select the box Restore an account? and place your Viewing Key in the text box.
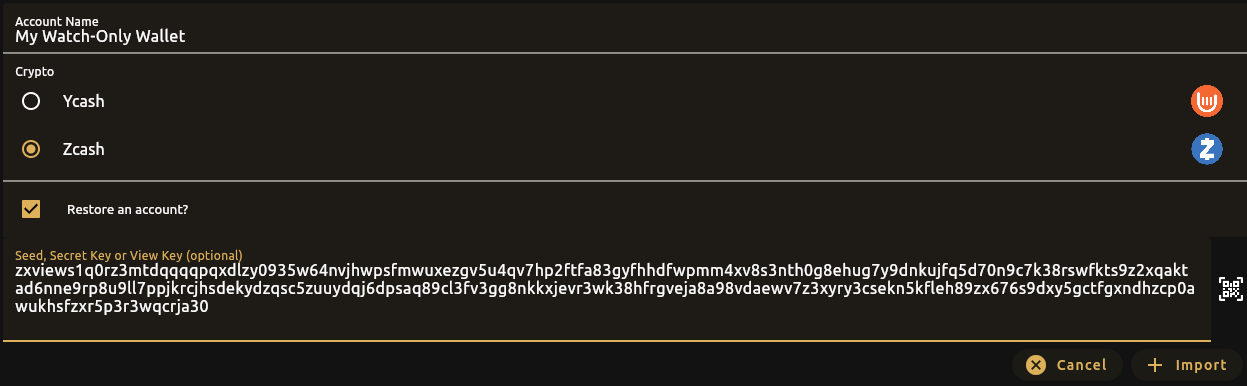
Finally click Import to import your Viewing Key and create a watch-only account.
The next step is to inform the birthday of your wallet, so YWallet can scan the blockchain for transactions. Since this is a newly created wallet, I'll tell YWallet to rescan from today (to be sure you can choose 1 or 2 days earlier).
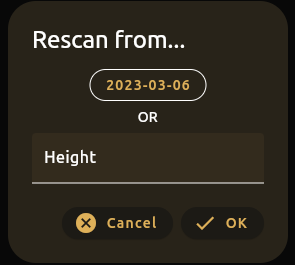
Selecte the date or enter the height, that is the block your wallet was created on, and then click Ok.
The synchronization shouldn't take to long, since there's only a few blocks since it's birthday.
IMPORTANT: Change your wallet from Basic to Advanced mode just like you did before in your offline wallet and also deselect the QR code option. So we can prepare and then broadcast our signed transations using a USB flash drive to transfer the files.
Preparing a transaction to be signed offline
First of all, I sent myself a few Zats from another wallet, so I have some funds to spend.
We can see our balance in YWallet main screen:
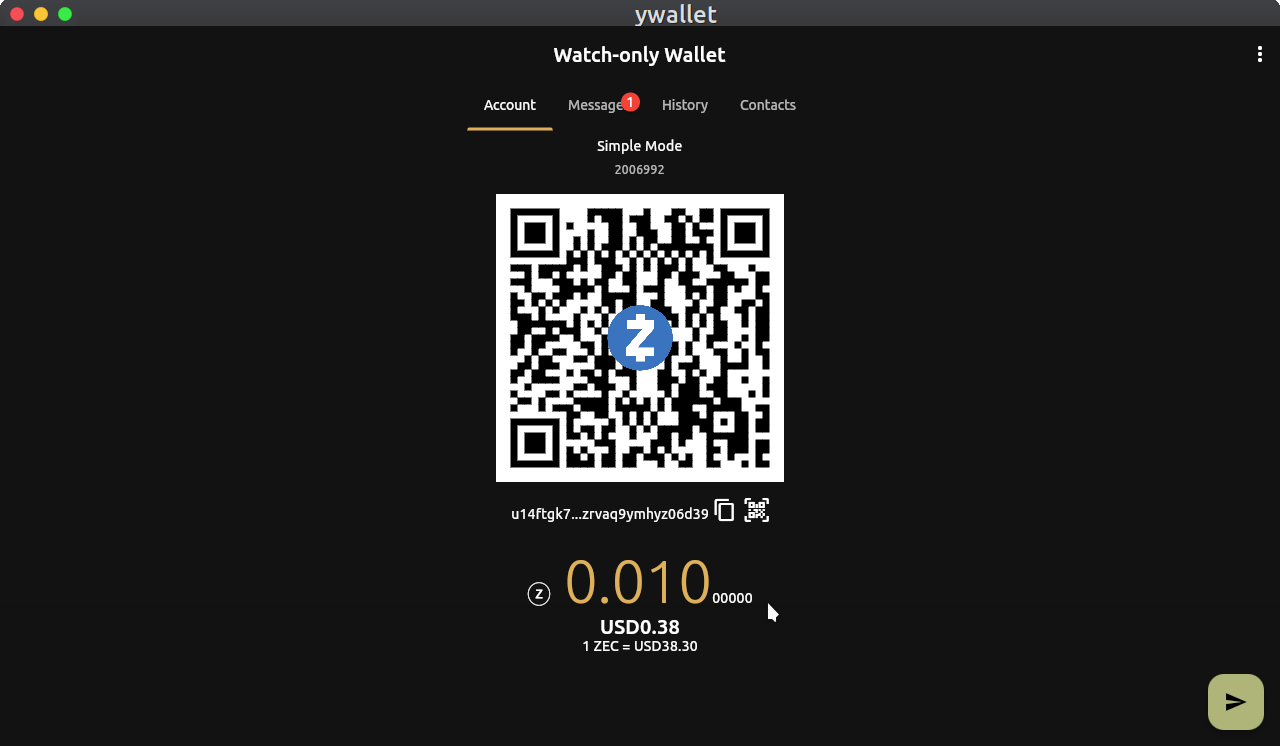
To start a transaction, click the arrow button in the bottom-right corner of YWWallet, you'll be redirected to the send screen. Fill the inputs correctly and select the amount to send. Optionally add a cool memo text.
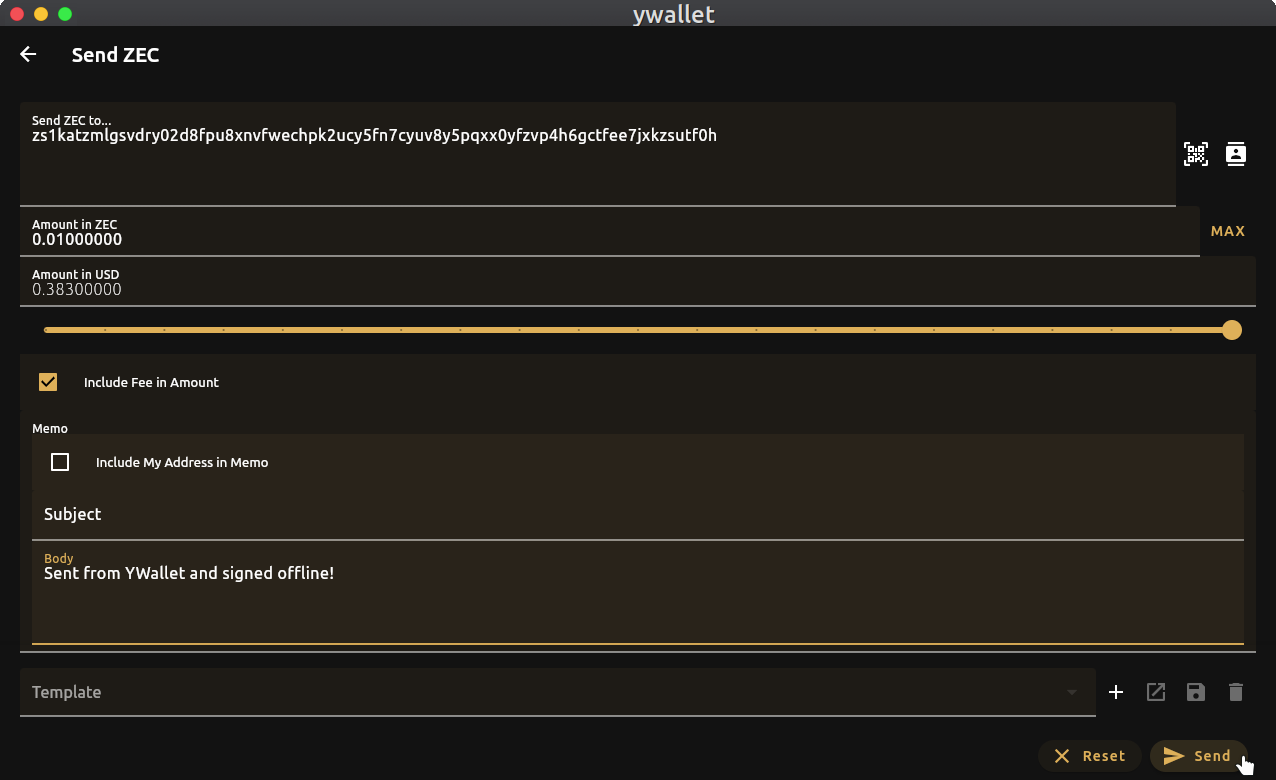
Click the send button, YWallet will ask for confirmation, check if everything is ok and then click Send
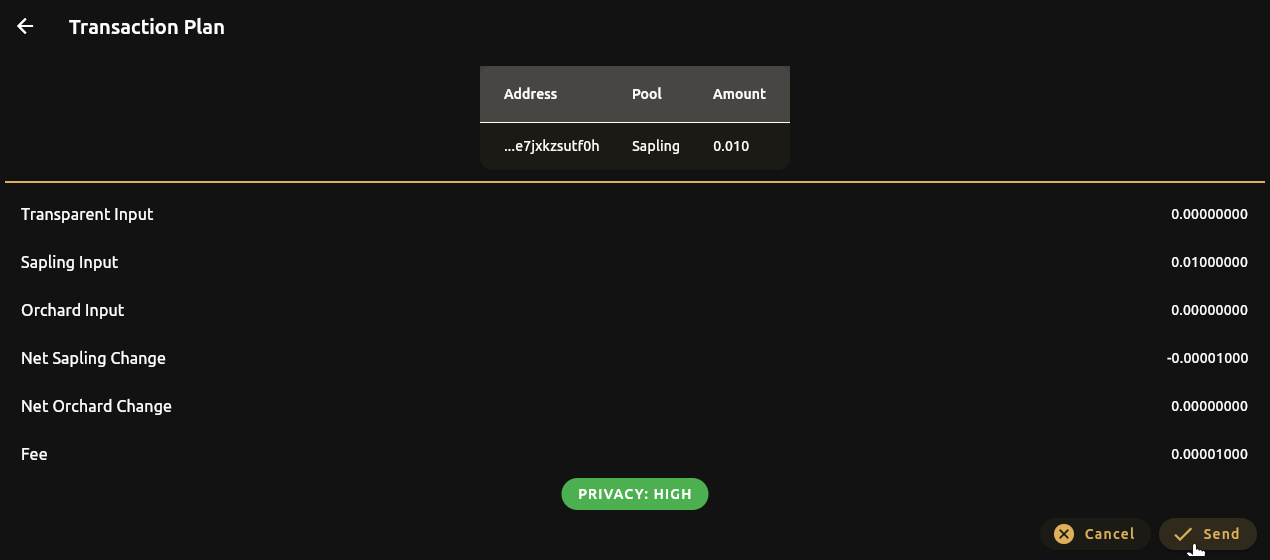
YWallet will show a file explorer dialog, save the file tx.json in your USB flash drive, this is the prepared transaction that you have to sign in your offline PC.
Signing the transaction
Now it's time to sign your transaction using your offline PC.
After you transafer the file tx.json from your online to your offline pc using a USB thumb stick or any other air gapped method you'll need to open YWallet and sign the prepared transaction.
But be quick! For safety reasons, the transaction expires after a few blocks!
Open YWallet in your offline PC, click the little three vertical dots on the top-right of YWallet, then select Advanced -> Sign
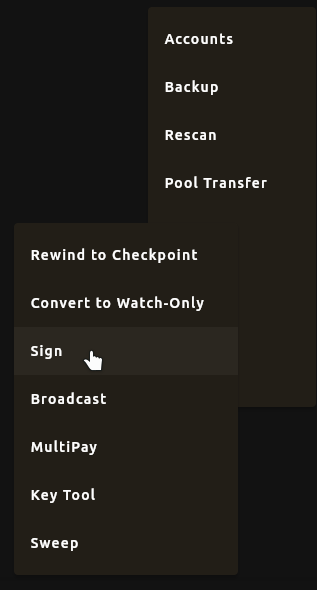
A file explorer will open, navigate to your USB flash drive and select the file tx.json and open it.
You'll be asked to confirm the transaction, review the details and click Send.
Another file explorer dialog will open, this time with the signed transaction file called tx.raw. Save this file into your USB flash drive.
The transaction signing is complete! Now back to our online PC for the last step.
Broadcasting the signed transaction
Now it's time to broadcast our signed transaction to the Zcash Blockchain. Plug the USB flash drive and open YWallet in your online computer.
Click the three little dots on the top-right corner and then Advanced -> Broadcast
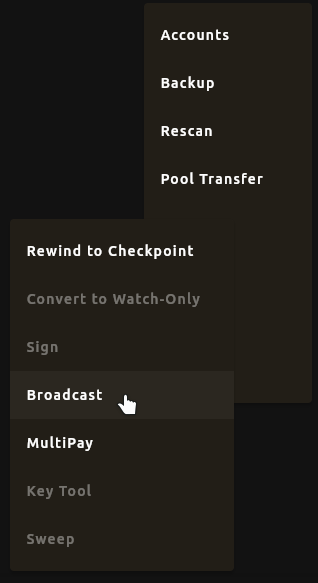
A file explorer dialog will show up, navigate to your USB flash drive and select the file tx.raw which is your signed transaction.
And as simple as that, your transaction was sucessfully broadcasted to the Zcash network!
You can go to your History and see the transaction:
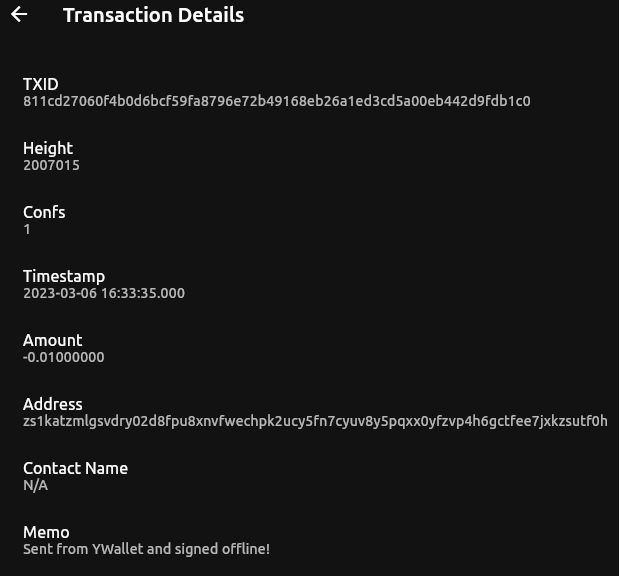
Yay! Everything worked out flawlessly!
Closing words
So, after the frustation of my previous attempt, YWallet came to the rescue with this simple, easy to learn method for preparing, signing and broadcasting Zcash transactions!
My secret keys never leaves my offline PC, making the custody of my funds and keys as safe as possible!
If you liked this article, please consider sending me a tip, it was a lot of work researching, writing and formatting this tutorial. Free2z makes tipping creators very easy, somewhere in this page you'll see a colourful button with the text DONATE, if you found this tutorial useful, feel free to send a few Zats. ;)
Best Regards, James Katz.